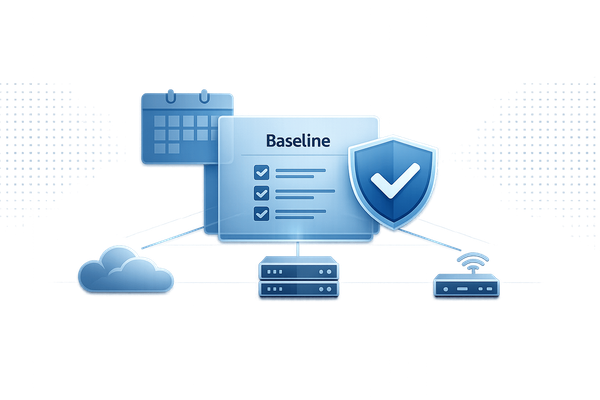
10 AWS Auto Scaling Tips for Better App Performance
Enhance your application performance and reduce costs with these essential AWS Auto Scaling tips for effective resource management.

AWS Auto Scaling can help your applications maintain performance while optimising costs. Here’s a quick guide to the top tips for using it effectively:
- Set Clear Scaling Policies: Choose the right scaling policy (e.g., target tracking, step scaling, or predictive scaling) and configure thresholds to avoid frequent adjustments.
- Select the Right Instance Sizes: Use tools like AWS Compute Optimizer to match instance sizes to your workload and consider cost-saving options like AWS Graviton processors.
- Monitor and Set Alerts: Use AWS CloudWatch to track key metrics like CPU usage, response time, and queue depth. Enable notifications to stay ahead of potential issues.
- Deploy Across Multiple Availability Zones: Spread resources across zones to ensure reliability and minimise downtime.
- Automate Infrastructure Setup: Use tools like AWS CloudFormation or Terraform to define and deploy infrastructure consistently.
- Configure Timing Controls: Adjust cooldown and warmup times to prevent unnecessary scaling actions and stabilise performance.
- Set Health Checks: Combine EC2 and load balancer health checks to detect and replace failing instances quickly.
- Use Lifecycle Hooks: Customise instance launch and termination processes to ensure proper setup and graceful shutdowns.
- Track and Control Costs: Use AWS Budgets, Cost Explorer, and tagging to monitor expenses and optimise instance pricing models.
- Test and Review Regularly: Perform load tests, monitor metrics, and adjust scaling policies based on actual performance and traffic patterns.
Quick Comparison
| Tip | Purpose | Key Benefit |
|---|---|---|
| Set Clear Scaling Policies | Adjust resources based on demand | Prevent over/under-scaling |
| Select the Right Instance Sizes | Match resources to workload | Reduce costs by up to 36% |
| Monitor and Set Alerts | Track performance metrics | Proactive issue detection |
| Deploy Across Multiple AZs | Distribute resources geographically | Improve reliability and uptime |
| Automate Infrastructure Setup | Use Infrastructure as Code (IaC) tools | Consistent and faster deployments |
| Configure Timing Controls | Optimise scaling timing | Avoid unnecessary scaling actions |
| Set Health Checks | Ensure instance reliability | Replace failing instances promptly |
| Use Lifecycle Hooks | Customise instance setup/shutdown | Smooth transitions during scaling |
| Track and Control Costs | Monitor and optimise expenses | Prevent unexpected cost overruns |
| Test and Review Regularly | Validate scaling performance | Maintain efficiency and reliability |
These tips ensure your applications scale efficiently, stay reliable, and keep costs under control. Dive into the article for detailed guidance on each strategy.
AWS Auto Scaling Deep Dive
1. Set Up Clear Scaling Policies
To manage your application's performance effectively, it's crucial to establish clear scaling policies. These policies dictate when and how to adjust resources based on demand, ensuring your system runs efficiently without overspending. The trick lies in selecting the right policy for your workload and fine-tuning it to avoid unnecessary costs.
AWS provides four main types of scaling policies, each designed for specific needs. Let's break them down:
- Target tracking scaling: This policy automatically adjusts capacity to maintain a predefined metric target, such as 70% CPU utilisation. AWS handles the adjustments for you, making it a hands-off option.
- Step scaling policies: These allow for more detailed control by setting multiple thresholds with tailored scaling actions. For example, you could scale out by two instances when CPU hits 70%, but add five instances if it spikes to 90%. This is ideal if you can anticipate how your application reacts under varying loads.
- Simple scaling policies: As the name suggests, this is the simplest option. It triggers a single scaling action based on one alarm and waits for a cooldown period before acting again. While easy to set up, it’s less responsive compared to step scaling.
- Predictive scaling: Using machine learning, this policy forecasts demand based on historical trends. It preemptively scales resources, which is particularly useful for predictable traffic surges, like Black Friday or Boxing Day sales in the UK.
| Scaling Policy Type | Best Used When | Key Benefit |
|---|---|---|
| Target tracking scaling | Metrics scale proportionally with capacity | Minimal manual intervention |
| Step scaling | You can predict different load thresholds | Precise control over scaling |
| Simple scaling | Simple workloads with basic needs | Quick to configure |
| Predictive scaling | Traffic patterns are regular and predictable | Prepares resources proactively |
Once you've chosen a policy, configuring metrics and thresholds is essential. To avoid resource "flapping" - where scaling actions are triggered too frequently - set distinct thresholds. For instance, you could scale out at 80% utilisation and scale in at 60%. This buffer prevents unnecessary back-and-forth adjustments.
Metrics should reflect the actual user experience, not just system performance. For example:
- If you're using SQS queues, monitor
ApproximateNumberOfMessages. A queue depth exceeding 50 messages signals the need to scale out. - For web apps behind an Application Load Balancer, track
RequestCountPerTarget. Scaling might be required when requests exceed 1,000 per second per target. - Response time is another vital metric. If
TargetResponseTimesurpasses 300ms, users will likely notice the lag, making it a good trigger for scaling. - For applications using ElastiCache, keep an eye on
CacheMissCount. A high miss count suggests your cache is struggling, and scaling compute resources can ease database pressure.
A key point to remember is that AWS Auto Scaling prioritises the policy with the greatest impact - the one that results in the largest capacity change, whether scaling out or in. This ensures your application gets the resources it needs during critical times but also means you need to design policies carefully to prevent unexpected behaviour.
Ultimately, the right scaling policy depends on your workload. Use target tracking for proportional adjustments and step scaling for more precise, threshold-based actions.
2. Choose the Right Instance Sizes
Selecting the correct instance size is a smart way to improve performance while trimming down unnecessary costs. By tailoring instance sizes to match specific workloads, you can enhance efficiency and significantly cut monthly AWS expenses.
For instance, properly sized resources can lower AWS costs by up to 36%. If your business spends £10,000 a month on AWS, that’s a potential saving of £3,600 per month - or a hefty £43,200 annually.
Understanding Instance Families
AWS offers over 750 instance types, grouped into five main families, each suited for different kinds of workloads:
- General Purpose (T3, M5, M6i): Ideal for balanced needs across CPU, memory, and networking.
- Compute Optimised (C5, C6i): Designed for CPU-heavy tasks that require high-performance processors.
- Memory Optimised (R5, X1e): Perfect for applications demanding high memory-to-CPU ratios, such as in-memory databases.
- Storage Optimised (I3, D3): Suited for workloads requiring high sequential read/write access to large datasets.
- Accelerated Computing (P4, G4): Built for GPU-intensive tasks like machine learning and graphics processing.
The trick is not to guess but to review your usage patterns. AWS CloudWatch provides valuable metrics to guide your decisions. Focus on CPU and memory utilisation over a four-week period. If usage consistently stays below 40%, you can confidently downsize your instance, potentially halving its size.
Consider AWS Graviton Processors
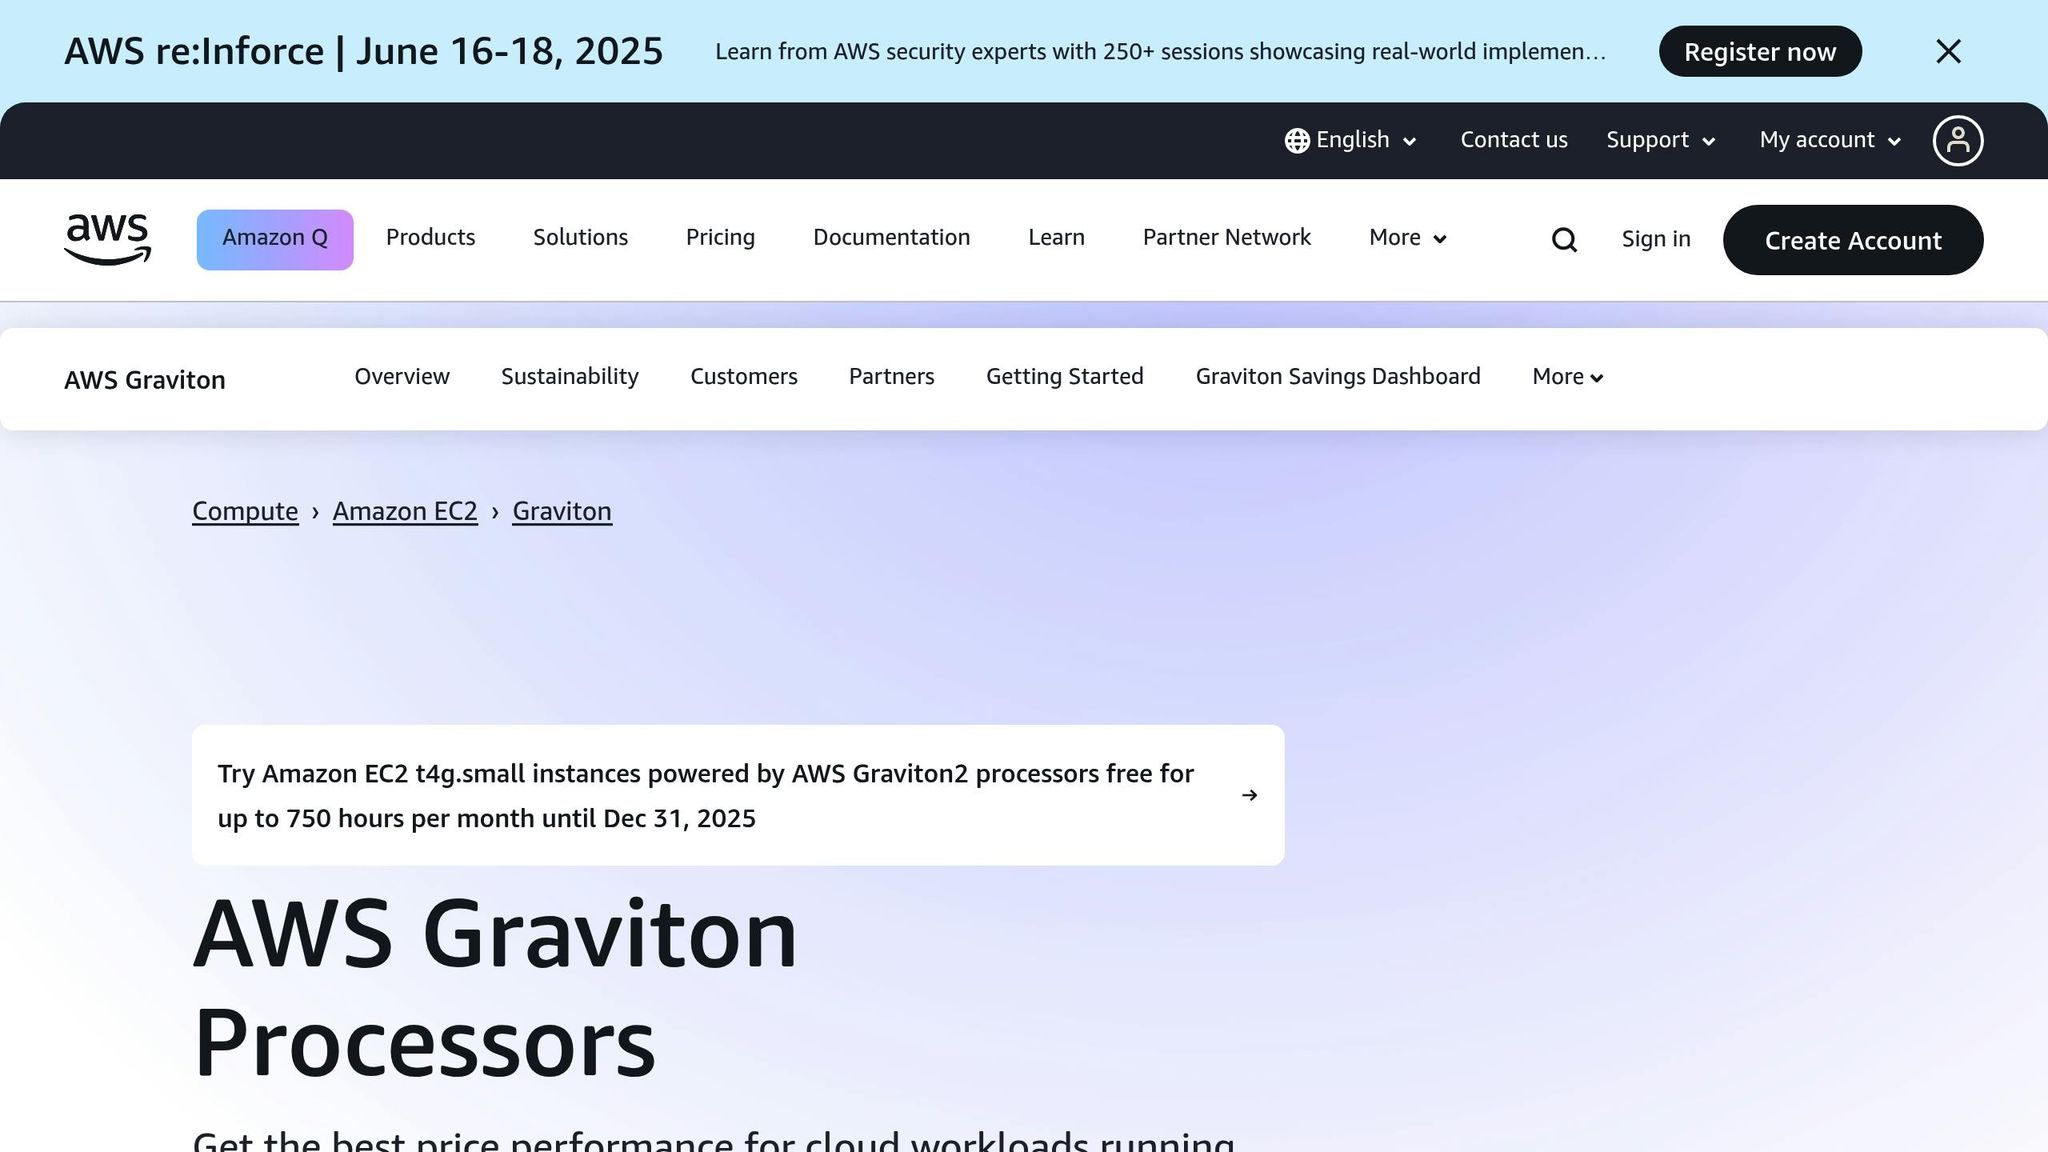
If cost efficiency is a priority, AWS Graviton processors are worth exploring. These ARM-based processors offer up to 40% better price performance compared to their non-Graviton counterparts. Switching to Graviton-powered instances like C6g or M6g can be a cost-effective move for many workloads without compromising on performance.
Leverage AWS Compute Optimizer
AWS Compute Optimizer simplifies the process of right-sizing. This free tool analyses 14 days of historical usage data and provides tailored recommendations. It categorises your Auto Scaling groups as "Not optimised", "Optimised", or "None", offering clear guidance on where adjustments are needed. By following its suggestions, you could reduce costs by as much as 25%.
Maximise Savings with Smart Strategies
When evaluating Compute Optimizer’s recommendations, consider how they fit into your pricing strategy. Reserved Instances can lower costs by up to 72%, while Spot Instances may offer discounts of up to 90%. For Auto Scaling groups, a mix of instance types and purchasing options can help balance cost and availability.
Here’s how different scenarios might influence your decisions:
- Steady-state workloads: Reserved Instances provide the best value.
- Variable but predictable traffic: Auto Scaling groups can dynamically adjust capacity.
- Development and testing environments: Schedule them to shut down during non-business hours.
- Temporary workloads: Spot Instances are ideal for tasks with flexible timing.
Additionally, terminate any instances that have been idle for over two weeks. This simple step can immediately cut down your AWS bill without affecting performance.
Test and Adjust Gradually
AWS Auto Scaling makes it easy to experiment with and adjust instance sizes. Start by implementing recommendations from Compute Optimizer, make changes incrementally, and monitor the results. Migrating within the same instance family is simpler than switching between families, so prioritise size adjustments before exploring entirely different types.
The goal here isn’t just to save money - it’s to strike a balance between performance and efficiency. By optimising instance sizes, your applications can scale seamlessly, keeping both users and your finance team satisfied. Once you’ve nailed down the right instance sizes, the next logical step is to establish strong monitoring systems to keep performance on track.
3. Set Up Monitoring and Alerts
Good monitoring isn't just about reacting to problems; it's about staying ahead of them. With proper alerts in place, you can shift from scrambling to fix issues after they occur to managing performance proactively. AWS CloudWatch provides the tools you need to spot potential trouble and trigger scaling actions before things spiral out of control. Here's how to set up monitoring effectively.
Start with CloudWatch's Built-in Recommendations
AWS CloudWatch simplifies the setup process with built-in alarm recommendations. These help you quickly identify the most critical metrics for your specific services. CloudWatch can even pre-fill settings such as threshold values for these alarms. If you're using infrastructure-as-code, you can export these definitions for seamless integration.
Prioritise Business-Critical Metrics
Once you've got the basics in place, it's time to fine-tune your alerts. Instead of just monitoring traditional metrics like CPU or memory usage, focus on metrics that align with your business goals. For instance, if you're running an e-commerce platform, tracking active user sessions or transaction rates might be more insightful than CPU utilisation alone.
Here are some examples of business-critical metrics worth monitoring:
- DatabaseConnections: Keep an eye on RDS instances to spot connection pool exhaustion.
- ActiveFlowCount: Monitor connection patterns for Network Load Balancers.
- CacheHitRate: Use this to identify early signs of performance issues in ElastiCache.
Enable Detailed Monitoring for Quicker Insights
Switching to detailed monitoring allows you to collect metric data every minute instead of every five minutes. This faster data collection is crucial for apps that experience rapid traffic changes. You can also enable Auto Scaling group metrics, which include capacity data in forecast graphs, making it easier to evaluate scaling performance.
Set Up Multiple Scaling Triggers
To make your scaling strategy more robust, configure multiple triggers for a single group. For example, you could set rules to scale based on both CPU spikes and a backlog in SQS queues. This layered approach ensures your application can handle a variety of load conditions effectively.
Configure Alert Actions Smartly
When you create alarms, set them to send notifications to an SNS topic whenever they transition to ALARM, OK, or INSUFFICIENT_DATA states. Beyond notifications, you can configure alarms to automatically trigger actions like Auto Scaling or EC2 adjustments when specific thresholds are met.
Use Historical Data to Fine-Tune Thresholds
Historical performance data is a goldmine for setting accurate thresholds. For example, you could set a 4XXError alarm for API Gateway at 5% to flag excessive client-side errors. Similarly, for Auto Scaling groups, consider alarms based on GroupInServiceCapacity. Set thresholds to match your minimum required capacity, typically aligned with the GroupDesiredCapacity metric.
Reduce Noise with Composite Alarms
Composite alarms are a great way to cut down on unnecessary notifications. These alarms only trigger when multiple conditions are met, such as a combination of CPU usage, memory consumption, and queue depth indicating a likely failure. Testing your application will help you identify which secondary metrics predict issues in your primary metrics, such as error rates or latency.
4. Deploy Across Multiple Availability Zones
Setting up Auto Scaling groups across multiple Availability Zones (AZs) is a smart way to ensure your services remain available, even if a single data centre experiences an outage. This approach not only strengthens resilience but also simplifies scaling configurations.
Why Multi-AZ Deployment Matters for UK Businesses
Availability Zones are independent data centres within an AWS region, each designed with its own infrastructure. They avoid single points of failure - like shared generators or cooling systems - making them highly reliable. For UK businesses, this setup is particularly relevant, offering both data residency compliance and protection against localised disruptions.
For instance, a cooling system failure in one data centre could lead to service interruptions. Deploying across multiple AZs ensures that such issues don’t bring your services to a halt.
"To take advantage of the safety and reliability of geographic redundancy, span your Auto Scaling group across multiple Availability Zones of the Region you are working in and attach a load balancer to distribute incoming traffic across those Availability Zones."
– Amazon Web Services, Inc.
The Technical Benefits You'll See
Deploying across multiple AZs allows Auto Scaling to dynamically adjust capacity. If one zone encounters problems, new instances are automatically launched in unaffected zones. Once the issue is resolved, instances are evenly redistributed without requiring manual input. Failovers typically occur within 35 seconds to two minutes. Additionally, network latency between AZs is usually less than 1 millisecond, so performance remains steady.
Setting Up Multi-AZ Auto Scaling
When setting up your Auto Scaling group, you'll need to select at least one AZ, but for redundancy, it’s best to choose at least two. If you're using Application Load Balancers (ALBs), ensure that at least two zones are enabled. To add an AZ to an existing Auto Scaling group:
- Open the Amazon EC2 console and locate your Auto Scaling group.
- Update the network settings to include subnets from the additional AZs.
- Adjust your load balancer configuration to cover the new AZ.
Key configuration steps include:
- Selecting subnets from different AZs.
- Configuring Elastic Load Balancing to create nodes in each active AZ.
- Enabling cross-zone load balancing to distribute traffic evenly.
- Adding database connection retries at the application layer.
Cost and Performance Considerations
While deploying across multiple AZs incurs extra costs, the benefits - better uptime and reliability - often outweigh the expense. AWS guarantees a 99.9% uptime SLA for single-AZ deployments and 99.99% when resources span multiple AZs. Beyond reliability, load balancers distribute traffic across all healthy zones, improving response times during high-demand periods and supporting more users simultaneously.
| Deployment Type | Failover Time | Uptime SLA | Data Loss Risk |
|---|---|---|---|
| Single-AZ | Hours (manual recovery) | 99.9% | High – up to 5 minutes of data |
| Multi-AZ (one standby) | 60 seconds | 99.99% | Minimal |
| Multi-AZ (two standbys) | Under 35 seconds | 99.99% | Minimal |
For UK businesses working with sensitive or regulated data, multi-AZ deployments are often essential. They not only help meet compliance requirements but also deliver the reliability and speed customers expect. By optimising your deployment across multiple zones, you can ensure your application remains responsive and efficient, even under fluctuating demand.
5. Automate Infrastructure Setup
Manually setting up Auto Scaling groups through the AWS console can be a cumbersome and error-prone process. This is where Infrastructure as Code (IaC) tools come in. By defining your infrastructure in code, you can make deployments faster, more consistent, and easier to manage. Automating this process is crucial for running efficient and reliable applications with AWS Auto Scaling.
Why Manual Setup Falls Short
Managing infrastructure manually just doesn’t cut it when scaling is a priority. It’s slow, prone to mistakes, and difficult to audit or replicate across teams. When you rely on the AWS console for setting up Auto Scaling groups, there’s always the risk of missing critical configurations or inconsistencies creeping into your environments.
"A cornerstone of reliability in the cloud is the programmatic definition, provisioning, and management of your infrastructure and resources." – AWS Well-Architected Framework
Picking the Right IaC Tool
There are several IaC tools that work seamlessly with AWS Auto Scaling groups, each offering distinct advantages. Here’s a quick breakdown:
- AWS CloudFormation: This is Amazon’s own tool, deeply integrated into the AWS ecosystem. It uses JSON or YAML templates, making it an ideal choice if your infrastructure is entirely within AWS.
- Terraform: A popular choice for multi-cloud environments, it uses a declarative configuration language. Though no longer fully open source, it remains widely adopted.
- OpenTofu: A fully open-source alternative to Terraform, offering similar functionality.
- Pulumi: Designed for developers, it allows you to write infrastructure code in languages like Python, TypeScript, and Go.
- Ansible: While not a traditional IaC tool, it excels at configuration management and software updates using YAML-based playbooks and agentless SSH.
When choosing a tool, think about your team’s familiarity with the platform, whether you need multi-cloud support, and how well it integrates with your current systems.
Implementing IaC for Auto Scaling Groups
To set up Auto Scaling groups effectively with IaC, follow these steps:
- Use version control: Store your IaC templates in a repository like Git for easy tracking and collaboration.
- Define infrastructure components: Include resources like VPCs, Auto Scaling groups, and databases in your templates.
- Optimise scaling policies: Set up metric-based scaling policies, such as CPU utilisation thresholds, and configure CloudWatch alarms to trigger scaling events.
- Leverage launch templates: Use launch templates instead of launch configurations for better flexibility and control over instance specifications.
By defining these elements in code, you ensure consistency across all environments.
Automating Delivery Pipelines
Integrating your IaC setup with a CI/CD pipeline takes automation to the next level. AWS CodePipeline offers a native solution for continuous integration and deployment, but tools like Jenkins or GitLab CI/CD are also excellent options.
Include approval steps in your pipeline to keep changes under control. Monitor deployments closely for issues and have rollback mechanisms in place to address failures quickly. This kind of automated pipeline ensures your infrastructure can adapt to changing demands without delays.
| Tool | Best For | Key Advantage |
|---|---|---|
| AWS CloudFormation | AWS-only environments | Deep integration with AWS |
| Terraform/OpenTofu | Multi-cloud setups | Broad platform compatibility |
| Pulumi | Developer-friendly | Familiar programming languages |
Security and Best Practices
Security should always be a top priority when implementing IaC. Here are some key practices to follow:
- Protect sensitive information: Avoid hard-coding secrets and use secure storage solutions. Regularly rotate credentials to minimise risks.
- Control access: Restrict who can view or edit your IaC templates.
- Monitor activity: Keep an eye on logs for any unauthorised access attempts.
- Automate provisioning: Delegate resource creation to automated processes instead of relying on manual command-line or console actions.
6. Configure Scaling Timing Controls
Fine-tuning your scaling timing controls is essential for maintaining stable performance. Without proper timing settings, your applications could face rapid scaling changes - known as "thrashing" - where instances are added and removed too quickly to be effective. This can destabilise your system and lead to unnecessary costs.
Understanding Cooldown Periods
Cooldown periods act as a pause after your Auto Scaling group launches or terminates instances. During this pause, further scaling actions are delayed, giving your instances time to stabilise and perform optimally. This prevents the system from making premature adjustments.
By default, AWS sets the cooldown period to 300 seconds (5 minutes). However, this default may not suit every application. If your instances take longer to initialise or your application needs extra time to handle traffic spikes, adjusting this value is crucial.
"As a best practice, we recommend that you do not use simple scaling policies and scaling cooldowns. A target tracking scaling policy or a step scaling policy is better for scaling performance." - Amazon EC2 Auto Scaling Documentation
Unlike simple scaling policies, target tracking and step scaling policies can trigger a scale-out event immediately, bypassing the cooldown period. However, while scaling out, any scale-in actions are paused until the new instances are fully operational.
Configuring Instance Warmup Times
Instance warmup times define how long an instance waits after reaching the InService state before contributing to aggregated usage metrics. This delay ensures that scaling decisions aren't influenced by data from instances still in the process of initialising.
To set the right warmup time, consider how long your instances typically need to stabilise and start handling traffic effectively. A good starting point is 300 seconds, which you can adjust based on your application's behaviour.
You might also use lifecycle hooks to run startup scripts or configuration tasks before an instance is fully activated. This can reduce the required warmup time by ensuring instances are fully prepared before they begin handling traffic.
Preventing Costly Scaling Fluctuations
Poorly configured timing controls can lead to frequent scaling adjustments, which not only disrupt performance but also increase costs. Rapidly launching and terminating instances wastes resources without delivering meaningful contributions to your application's workload.
| Timing Control | Applies To | Primary Purpose | Default Value |
|---|---|---|---|
| Cooldown Period | Simple scaling policies only | Prevents rapid scaling actions | 300 seconds |
| Instance Warmup | Target tracking and step scaling | Excludes new instances from metrics | 300 seconds (starting point) |
Best Practices for Timing Configuration
- Adjust timing regularly: As your workload evolves, revisit and tweak your timing settings to ensure optimal performance.
- Separate cooldown periods: Use different cooldown durations for scaling in and scaling out, as terminating instances is generally faster than launching and initialising new ones.
- Optimise warmup times: Choose a warmup time that balances capturing accurate usage data while avoiding spikes caused by new instances starting up. A single default warmup time often works well across most features.
Keep in mind that cooldown periods apply to both scale-in and scale-out events for simple scaling policies, while warmup periods are specific to scale-out activities for target tracking and step scaling policies. Understanding this distinction is key to configuring effective timing controls.
Regularly monitor your Auto Scaling groups during and after scaling events to ensure your timing settings are functioning as expected. Properly configured timing controls will stabilise your scaling strategy, improve performance, and help manage costs effectively.
7. Configure Health Checks for Automatic Recovery
Once you've established scaling policies and monitoring systems, setting up effective health checks is the next step in ensuring your app runs smoothly. Health checks play a crucial role in identifying and replacing failing instances before they can impact performance or user experience. Without proper configuration, unhealthy instances could linger, dragging down the overall performance of your application.
Understanding Health Check Types
AWS Auto Scaling provides several health check options, each monitoring different aspects of your infrastructure. By default, Amazon EC2 status checks are used to ensure instances are operational and to detect hardware or software issues. If you're running web applications behind a load balancer, Elastic Load Balancing (ELB) health checks can be enabled to evaluate whether instances are capable of handling requests.
Other available health checks include:
- VPC Lattice health checks: Similar to ELB checks, these monitor the health of services within your virtual private cloud.
- Amazon EBS health checks: These verify that storage volumes are accessible and performing as expected.
- Custom health checks: These allow you to define specific criteria based on your application's unique requirements.
| Health Check Type | What It Monitors | Default Status |
|---|---|---|
| Amazon EC2 status checks | Instance state and hardware/software issues | Enabled |
| Elastic Load Balancing | Instance readiness to handle requests | Disabled |
| VPC Lattice | Service health within the VPC | Disabled |
| Amazon EBS | Storage volume accessibility and I/O performance | Disabled |
| Custom health checks | Application-specific performance criteria | User-defined |
Configuring Effective Health Monitoring
After selecting the appropriate health checks, configure them to align with your application's performance needs. When an instance fails its health checks, AWS Auto Scaling typically allows a short delay to see if the issue resolves itself. However, instances that stop running entirely are immediately flagged as unhealthy and replaced. For applications using load balancers, enabling ELB health checks adds an additional layer of monitoring. If an instance fails these checks, it will be marked for replacement during the next cycle.
Shallow health checks are often used to monitor local conditions, such as critical processes or file system integrity. These checks focus on the instance itself, avoiding the influence of external dependencies.
Avoiding Common Health Check Pitfalls
One common mistake is combining local and external health checks. While this may seem thorough, it can lead to the unnecessary termination of healthy instances during external service failures. Instead, rely on shallow health checks for internal monitoring and use separate systems to track external dependencies. This approach minimises the risk of mass terminations.
AWS Auto Scaling also limits replacement activity to safeguard your application's availability, ensuring no more than 10% of the group's desired capacity is replaced at a time.
Implementing Custom Health Monitoring
If the default EC2 or ELB checks don't fully meet your application's needs, custom health checks provide a tailored solution. These can be based on specific metrics like database connectivity or other critical performance indicators. A popular method is the heartbeat table pattern, where instances update a shared resource at regular intervals to confirm they are operational. This approach provides clear visibility into the health of each instance while avoiding large-scale terminations.
Optimising Health Check Configuration
To ensure seamless recovery and instance replacement, fine-tune your health check settings. For web-facing applications, ELB health checks often provide a better reflection of real-world traffic and user experience compared to basic EC2 status checks. Combining ELB and EC2 health checks offers a more comprehensive view of your application's health. Additionally, configure intervals and thresholds to match your application's startup times and performance requirements. This ensures that new instances are launched and ready to take over as soon as unhealthy ones are terminated.
8. Use Lifecycle Hooks for Custom Setup
Lifecycle hooks are a powerful tool that lets you pause instance activity during launch or termination. This pause allows you to carry out custom actions, ensuring instances are fully configured before handling traffic or properly shut down when they're no longer needed. This approach integrates smoothly with your Auto Scaling strategy.
How Lifecycle Hooks Work
AWS Auto Scaling lifecycle hooks enable you to perform custom tasks during instance launch or termination events. When a scaling event triggers, instances are placed in a wait state for up to an hour, giving you time to complete any required actions before they move to the next state.
In a scale-out scenario, instances transition from Pending to Pending:Wait. This pause allows you to run setup scripts, install dependencies, or configure the instance. Once the setup is done, the instance moves to InService. For scale-in events, instances enter a Terminating:Wait state, giving you a chance to back up data, drain connections, or clean up resources before termination.
Lifecycle hooks return either "abandon" or "continue". For a launch, "continue" confirms successful setup, allowing the instance to proceed. "Abandon" signals a failure, prompting the system to replace the instance. During termination, both "continue" and "abandon" result in the instance shutting down, but "abandon" halts any remaining actions, while "continue" allows other lifecycle hooks to finish.
Tailoring Application Setup at Launch
Lifecycle hooks are particularly useful for making sure your applications are fully prepared before they start receiving traffic. For example, during a scale-out event, you can use the wait state to install software packages, configure settings, or establish database connections.
A common use case is installing the CodeDeploy agent as part of your setup scripts. This ensures deployments won’t proceed until all dependencies are installed. Similarly, you can pull configuration files from S3, register the instance with service discovery tools, or warm up application caches during this time.
To move the instance to the next state, you must send the complete-lifecycle-action command when your setup is done. If this command isn’t sent, the instance will stay in the wait state until the timeout period ends.
Managing Graceful Shutdowns and Data Protection
Lifecycle hooks are equally valuable during termination events, giving you time to handle shutdown processes carefully. For instance, CircleCI uses lifecycle hooks to send notifications when an instance is about to shut down. The instance enters a "Terminating:Wait" state, triggering an SNS notification. A Lambda function then uses AWS SSM to execute a shutdown command, ensuring a clean process.
During this wait state, you can also automate tasks like downloading logs, backing up databases, or transferring workloads to other instances using Lambda functions.
Setting Timeouts and Monitoring
While the default one-hour timeout is sufficient for most tasks, you can extend it by using the RecordLifecycleActionHeartbeat API call. However, there’s a limit - instances can remain in the wait state for up to 48 hours or 100 heartbeat extensions, whichever comes first.
It's essential to implement strong error handling in Lambda functions or other processes triggered by lifecycle hooks. Monitoring lifecycle hook events is also crucial for identifying and addressing issues proactively.
Keep in mind that lifecycle hooks are a best-effort solution. They don’t guarantee prevention of termination if something goes wrong. Design your applications to handle unexpected terminations gracefully, and avoid long or blocking operations that could disrupt scaling responsiveness.
9. Track and Control Scaling Costs
Auto Scaling enhances performance, but without proper cost oversight, your AWS bills can spiral out of control. Thanks to the pay-as-you-go model, unexpected expenses can arise if you're not actively monitoring costs. To avoid surprises, it’s vital to establish tracking and controls before scaling events occur.
Real-Time Cost Monitoring Tools
AWS offers several built-in tools to help you stay on top of scaling costs in real time. AWS Cost Explorer is a free tool that provides detailed insights into your spending patterns. It allows you to break down costs by service, region, or time period, giving you a clear view of where your Auto Scaling expenses originate.
For a more hands-on approach, enable AWS Cost Anomaly Detection. This service uses machine learning to spot unusual spending behaviours and can send alerts when your Auto Scaling groups exceed normal resource consumption thresholds. This is especially helpful for small and medium-sized businesses that may not have the resources to monitor costs 24/7.
Another layer of protection comes from AWS Budgets, which acts as a financial safety net. You can set custom budgets for specific Auto Scaling groups or overall EC2 spending. Alerts are sent via email or SMS when costs approach your set limits. The first two budgets are free, with additional action-enabled budgets costing £0.08 per day.
Using Effective Tagging Strategies
Cost allocation tags are a powerful tool for tracking Auto Scaling expenses across projects, teams, or environments. By tagging AWS resources, you can monitor costs with greater precision. Develop a consistent tagging strategy that includes labels like "Environment" (e.g., production, staging, development), "Project", "Owner", and "CostCentre". Use the AWS Management Console to manage these tags systematically, and integrate them into AWS Cost Explorer and AWS Budgets for detailed cost tracking.
This level of detail helps you make informed decisions about instance selection and pricing models.
Choosing the Right Instances and Pricing Models
Instance types and pricing models greatly influence your scaling costs. For predictable workloads, AWS Savings Plans and Reserved Instances can cut costs by up to 72%. For applications with consistent baseline traffic, Reserved Instances can cover your minimum capacity, while On-Demand instances handle any additional scaling needs.
For non-critical workloads, consider Spot Instances, which can offer up to 90% savings compared to On-Demand pricing. These are ideal for tasks like batch processing, development, or fault-tolerant applications that can manage interruptions.
To ensure you're not overpaying for oversized instances, use AWS Compute Optimizer. This tool provides recommendations based on your actual usage, helping you right-size instances and avoid unnecessary expenses.
Tailoring Cost Strategies for UK SMBs
If you’re a UK-based small or medium-sized business, align your cost strategies with specific local needs. For instance, consider the impact of data transfer costs when serving customers across multiple regions. To minimise these charges, configure your Auto Scaling groups to launch instances in the same Availability Zone as your primary resources.
"Cloud cost management is one of the pressing concerns for SMBs. We work with businesses to forecast and optimise their AWS spend and implement best practices for keeping costs under control." – Prakash Pilley, CEO at Deployflow
Adjust your Auto Scaling schedules to match UK business hours. For example, scale down non-production environments outside standard working hours - typically between 18:00 and 08:00, as well as during weekends.
Real-World Cost Optimisation Success
Practical examples show how effective these strategies can be. For instance, Alert Logic reduced their cloud costs by 28% while improving resource efficiency by focusing on cost-saving measures. Across the board, AWS users report saving up to 40% on cloud expenses by implementing similar optimisation techniques.
Automating Cost Controls
Automated cost controls can further enhance your cost management efforts. Use CloudWatch alarms to monitor both performance and cost metrics simultaneously. Set triggers for when hourly or daily spending surpasses predefined thresholds, giving you an early warning of potential cost overruns.
You can also configure automated responses to these alerts. For example, set your system to scale down Auto Scaling groups or switch to smaller instance types when costs approach budget limits.
To maintain cost efficiency, review your Auto Scaling policies monthly. Adjust thresholds and instance types based on actual usage patterns and spending trends.
For more detailed advice on managing AWS costs, especially for small and medium-sized businesses, check out the AWS Optimization Tips, Costs & Best Practices for Small and Medium-sized businesses blog. It’s packed with actionable strategies to help you manage cloud expenses while delivering excellent performance.
10. Test and Review Scaling Performance
After setting up AWS Auto Scaling, testing and reviewing its performance is essential to ensure it can handle real-world traffic without disruption. Skipping this step could leave you scrambling to fix scaling issues during critical peak times.
Load Testing Your Auto Scaling Groups
One of the best ways to validate your setup is through load testing. This process involves simulating sudden traffic spikes to observe how effectively Auto Scaling responds. Use tools designed for generating parallel requests while tracking key metrics like requests per second (RPS) and response latency.
For a simple CPU-based test, you can try the stress command to artificially increase CPU usage on your EC2 instances. This lets you check if new instances are launched as expected. However, for a more accurate picture, consider tests that mimic actual user behaviour.
It’s also wise to include a buffer during these tests. This safety margin ensures your system can handle unexpected surges in traffic while giving Auto Scaling policies enough time to react and deploy additional resources before performance suffers.
Monitoring CloudWatch Metrics for Validation
AWS CloudWatch is your go-to tool for tracking and validating scaling performance. Use its one-minute interval metrics for quicker issue detection. This level of detail helps you identify problems early and adjust scaling thresholds as needed.
Keep an eye on both infrastructure metrics (like CPU and network usage) and business metrics (such as active users and response times). Aligning scaling decisions with actual demand ensures your system performs efficiently. Enabling Auto Scaling group metrics also provides capacity forecast graphs, which offer insights into how your scaling decisions impact overall performance.
A practical example of this comes from Jay Van Blaricum, who tested an Auto Scaling group by stopping three instances. Within 300 seconds, the system detected the unhealthy instances and replaced them with new ones across different Availability Zones. The activity log confirmed the process worked seamlessly. This kind of real-time testing provides valuable feedback for fine-tuning your scaling strategy.
Choosing the Right Performance Metrics
Every application has unique requirements, so your scaling metrics should reflect its specific needs. Instead of relying solely on technical metrics like CPU usage, consider business-focused metrics like active users. This ensures your scaling decisions align with user demands rather than arbitrary thresholds.
"Every application will be slightly different and the best way to choose metrics is by testing it yourself." - HostisHumaniGeneris
For instance, if your application handles web requests, metrics like response time and error rates may be more relevant. On the other hand, for batch processing systems, queue length or processing throughput might be more useful indicators.
Implementing Continuous Review Processes
Scaling needs evolve as your business grows, so it’s important to regularly review and adjust your Auto Scaling configurations. Traffic patterns and application requirements can change, and what worked a few months ago might not be suitable now.
Set up SNS alerts for events like instance launches, terminations, and health check failures. These notifications keep you informed about scaling activities and can highlight patterns that may require adjustments.
For example, a media streaming company optimised their EC2-based transcoding setup by regularly reviewing and tweaking their scaling configurations. They reduced EC2 costs by 40% while maintaining 99.9% availability and handling triple the normal load during peak times. Their approach included using Spot Instances for non-critical workloads, predictive scaling based on historical data, and frequent policy reviews.
Staying Current with AWS Developments
AWS frequently introduces new features and services that can enhance your scaling strategy. Staying informed about these updates allows you to refine your setup for better performance and cost savings. Regularly review your architectural decisions to ensure they remain efficient.
Using CloudWatch Insights can help you analyse scaling history and identify trends or areas for improvement. This historical data is invaluable for predicting future needs and fine-tuning your scaling policies.
Establishing a Testing Schedule
To maintain optimal performance, establish a regular testing schedule. Conduct load tests every quarter or whenever you make significant changes to your application architecture. Document your configurations and use change management processes for updates.
Team reviews can also be beneficial. By discussing your Auto Scaling strategies as a group, you can uncover potential improvements and ensure everyone understands how the system behaves under different conditions. This collaborative approach prepares your team to handle scaling events effectively.
Testing and reviewing your scaling performance isn’t just about avoiding problems - it’s about improving user experience and cutting costs. Regular validation ensures your Auto Scaling setup keeps pace with your business’s changing needs.
Dynamic vs Scheduled Scaling Comparison
Understanding the nuances of dynamic and scheduled scaling can help you pick the right strategy for your application. These two approaches address different needs, depending on whether your traffic patterns are predictable or unpredictable.
Dynamic scaling reacts to real-time changes in resource usage. It monitors metrics like CPU usage, memory consumption, or network traffic, automatically adjusting the number of instances when specific thresholds are exceeded. This approach is ideal for handling unpredictable traffic spikes.
Scheduled scaling, on the other hand, operates on a predefined schedule. It increases or decreases capacity at set times, making it a great fit for applications with predictable traffic patterns - such as during business hours or seasonal events.
"Dynamic Scaling is a must-have for any modern cloud application. It ensures high availability, cost-efficiency, and automated scaling without human intervention."
- Bhavesh Atara
Dynamic scaling offers instant adaptability to traffic surges but requires precise configuration of policies and metrics. Scheduled scaling is simpler to set up, but it lacks the flexibility to respond to unexpected traffic changes.
| Feature | Dynamic Scaling | Scheduled Scaling |
|---|---|---|
| Trigger | Real-time metrics (e.g., CPU, network traffic) | Predetermined time intervals |
| Best For | Fluctuating traffic patterns | Predictable peak hours |
| Response Time | Instant reaction to real-time metrics | Adjusts based on schedule |
| Configuration | Requires thresholds and scaling policies | Simple time-based rules |
| Use Cases | Variable business loads | Routine daily patterns |
| Monitoring | Needs continuous metric tracking | No real-time monitoring required |
A hybrid approach often works best. For example, small and medium-sized businesses might use scheduled scaling to handle predictable peaks, such as office hours, and rely on dynamic scaling to address unexpected surges. This combination ensures consistent performance while balancing costs.
"With scheduled scaling, you can set up automatic scaling for your application based on predictable load changes."
- Amazon EC2 Auto Scaling Documentation
Take an e-commerce site as an example. If traffic consistently spikes during lunch hours and evenings, scheduled scaling can add instances at 11:30 and 18:00. Meanwhile, dynamic scaling can manage unexpected surges caused by flash sales or viral social media campaigns.
For dynamic scaling, target tracking policies are effective for maintaining a specific metric, like average CPU usage, at an optimal level. For scheduled scaling, historical data from CloudWatch can help you identify recurring traffic patterns and configure schedules accordingly.
Applications with steady, predictable traffic benefit from the simplicity and cost control of scheduled scaling. In contrast, those with unpredictable demand rely on dynamic scaling for its responsiveness to maintain performance and manage costs efficiently.
Conclusion
Adopting AWS Auto Scaling can revolutionise how small and medium-sized businesses (SMBs) in the UK manage both application performance and operational costs. With the ability to enhance application performance by up to 75% during unpredictable traffic spikes, it’s a game-changer for businesses looking to maintain seamless user experiences.
One of the standout benefits is cost efficiency. AWS Auto Scaling automatically adjusts resources based on demand, ensuring you only pay for what you use. This eliminates unnecessary spending on idle infrastructure during quieter periods. As IPSpecialist aptly puts it:
"AWS Auto Scaling optimises resource use and cost efficiency by ensuring you pay only for the capacity you need." - IPSpecialist
But it’s not just about saving money. AWS Auto Scaling also gives UK SMBs the flexibility to scale without investing in costly hardware upfront. Whether your traffic patterns are predictable or highly variable, the combination of dynamic and scheduled scaling ensures your applications remain robust, keeping customers happy without breaking the bank.
From seasonal e-commerce spikes to SaaS platforms with fluctuating user demand, these strategies provide a clear roadmap for achieving reliable and cost-effective performance. Start by setting clear policies and monitoring systems, and gradually incorporate advanced features as your business grows.
For more tailored advice on AWS optimisation, cost management, and scaling strategies for UK SMBs, head over to AWS Optimization Tips, Costs & Best Practices for Small and Medium sized businesses. Critical Cloud’s team of AWS specialists offers detailed insights to help your business thrive.
FAQs
What’s the best way to choose an AWS Auto Scaling policy for my application?
When choosing an AWS Auto Scaling policy, it's all about matching your application's needs and performance goals. Target tracking policies work well for dynamic scaling. They automatically adjust resources to keep a specific metric, like CPU utilisation, within the desired range. This makes them a solid choice for applications with workloads that frequently change.
If your application has more predictable or consistent load patterns, step scaling policies might be a better fit. These let you set specific actions based on predefined metric thresholds, giving you more control over scaling behaviour.
It's important to test different policies and metrics to figure out what works best for your application's performance and stability. The right choice will depend entirely on your workload patterns and specific requirements.
What are the main advantages of using AWS Auto Scaling across multiple Availability Zones?
Using AWS Auto Scaling across multiple Availability Zones brings several important advantages. For starters, it boosts application availability by spreading resources across different zones. This means your app can keep running smoothly even if one zone encounters problems.
It also strengthens fault tolerance and redundancy. If an instance underperforms, it's automatically replaced, minimising the chances of downtime. This approach creates a more dependable and robust infrastructure, which is especially crucial during high-pressure situations.
How can I monitor and manage AWS Auto Scaling costs to avoid unexpected charges?
To manage AWS Auto Scaling expenses effectively, start by leveraging Amazon CloudWatch to track essential metrics like CPU usage, memory, and network traffic. This monitoring helps pinpoint instances that are either underutilised or overstretched, allowing you to adjust resources more efficiently.
Implement scaling policies tied to these metrics, and set up budget alerts to keep your spending in check. You can also explore cost-cutting measures such as using spot instances, resizing your instances to better match your workload, and scheduling downtime for unused resources during off-peak hours.
Consistently reviewing and fine-tuning your scaling configurations based on up-to-date data is crucial for keeping costs manageable. These practices not only help you avoid surprise expenses but also ensure your application remains efficient and cost-effective.